Signing GitHub Commits in Manjaro Linux
Ensuring the authenticity and integrity of code contributions is an essential security practice. To support this, it’s common practice for repositories to protect themselves by requiring commits to be signed.
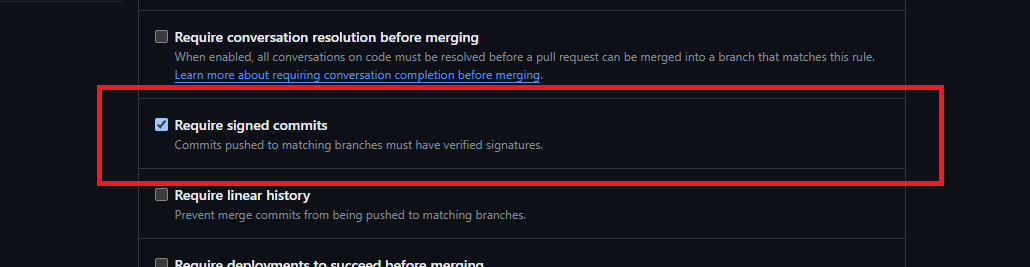
Signing a commit means adding a unique digital signature to it. This signature confirms who made the commit and ensures the commit hasn’t been tampered with. It’s like putting a seal of authenticity on your code changes.
To sign your commits in GitHub, you can use the commit signature verification feature. When GitHub verifies a commit signature, it helpfully marks the commit, providing assurance to others that the changes originate from a trusted source:

This post details the process of signing GitHub commits in Manjaro Linux using GPG (“GNU Privacy Guard”, open-source encryption software used for secure communication and data integrity verification). Following these steps:
- Understanding how to sign a commit
- Generating a GPG key
- Adding your GPG key to your GitHub account
- Tell Git About Your GPG Key
Prerequisites
- A GitHub account
- A Manjaro Linux environment
gpginstalled on your Manjaro Linux environmentgiginstalled on your Manjaro Linux environment
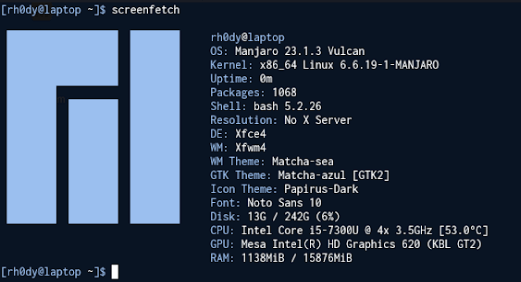
I’m running version 23.1 Vulcan, which has gpg installed by default:
$ gpg --version
gpg (GnuPG) 2.4.4
You can use pacman to install git:
$ pacman -S git
$ git --version
git version 2.44.0
How to Sign a Commit
Sign a commit using git you have to pass the -S flag (shorthand for –gpg-sign):
$ git commit -S -m 'Initial commit'
Without having commit signature verification set up, you’ll likely get an error indicating that no GPG key has been configured:
error: gpg failed to sign the data:
gpg: skipped "rh0dy <rh0dy@protonmail.com>": No secret key
[GNUPG:] INV_SGNR 9 rh0dy <rh0dy@protonmail.com>
[GNUPG:] FAILURE sign 17
gpg: signing failed: No secret key
fatal: failed to write commit object
This can be confirmed by listing your GPG keys. In this case, it yields no results:
$ gpg --list-secret-keys
$
Generating a GPG Key
Use gpg --full-generate-key to generate a new GPG key pair, this includes interactive dialogs for the configuration options:
- Kind: ECC (sign and encrypt)
- Elliptic Curve: Curve 25519
- Validity: Key does not expire (it’s possible to revoke a GPG key)
- Identity: rh0dy (rh0dy@protonmail.com)
- Passphrase: Enter a passphrase to encrypt your GPG private key
$ gpg --full-generate-key
gpg (GnuPG) 2.4.4; Copyright (C) 2024 g10 Code GmbH
This is free software: you are free to change and redistribute it.
There is NO WARRANTY, to the extent permitted by law.

Please select what kind of key you want:
   (1) RSA and RSA
   (2) DSA and Elgamal
   (3) DSA (sign only)
   (4) RSA (sign only)
   (9) ECC (sign and encrypt) *default*
  (10) ECC (sign only)
  (14) Existing key from card
Your selection? 9

Please select which elliptic curve you want:
   (1) Curve 25519 *default*
   (4) NIST P-384
   (6) Brainpool P-256
Your selection? 1

Please specify how long the key should be valid.
         0 = key does not expire
      <n>  = key expires in n days
      <n>w = key expires in n weeks
      <n>m = key expires in n months
      <n>y = key expires in n years
Key is valid for? (0) 0
Key does not expire at all
Is this correct? (y/N) y

GnuPG needs to construct a user ID to identify your key.
Real name: rh0dy
Email address: rh0dy@protonmail.com
Comment:
You selected this USER-ID:
    "rh0dy <rh0dy@protonmail.com>"
Change (N)ame, (C)omment, (E)mail or (O)kay/(Q)uit? O

We need to generate a lot of random bytes. It is a good idea to perform
some other action (type on the keyboard, move the mouse, utilize the
disks) during the prime generation; this gives the random number
generator a better chance to gain enough entropy.

gpg: directory '/home/rh0dy/.gnupg/openpgp-revocs.d' created
gpg: revocation certificate stored as '/home/rh0dy/.gnupg/openpgp-revocs.d/<Public Key ID>.rev'

public and secret key created and signed.
pub   ed25519 2024-04-03 [SC]
      <Public Key ID>
uid   rh0dy <rh0dy@protonmail.com>
sub   cv25519 2024-04-03 [E]

... A pop-up will appear, where you to enter a passphrase for your GPG key
Listing your GPG keys will now show information about the newly created GPG key pair:
$ gpg --list-secret-keys --keyid-format=long
gpg: checking the trustdb
gpg: marginals needed: 3  completes needed: 1  trust model: pgp
gpg: depth: 0  valid:   1  signed:   0  trust: 0-, 0q, 0n, 0m, 0f, 1u
/home/rh0dy/.gnupg/pubring.kbx
------------------------------
sec   ed25519/<Private Key ID> 2024-04-03 [SC]
      <Public Key ID>
uid                 [ultimate] rh0dy <rh0dy@protonmail.com>
ssb   cv25519/<Subkey ID> 2024-04-03 [E]
Adding a GPG Key to Your GitHub Account
First, export the public key from your newly created GPG key pair using gpg --armor --export <Private Key ID>, where the –armor flag outputs the public key in ASCII-armor format (for use with text-based communication) and the Private Key ID is listed in the sec section when listing your GPG keys (see the end of the Generating a GPG key step):
$ gpg --armor --export <Private Key ID>
-----BEGIN PGP PUBLIC KEY BLOCK-----
mDMEZg3D5BYJKwYBBAHaRw8BAQdAvEXffDkqtHgBn6yehlhb7Rfp6QN4OUCEitzH
wrZs2dezfc24fwdUB8ldiun/BQJmDcPkAhsDBQsJCAcCAiICBhUKCQgLAgQWAgMB
.. Full public key omitted
B8ldiun/+a4BAJXiFRYKCmXcVWUugVKlnTI0gdJfr8Zl1pc9KG7Ie/jzAQCVza6Q
tc8yEJkyXBSYIeLx9KrqvsP2n7nOBxgF7RXFAA===RBYL
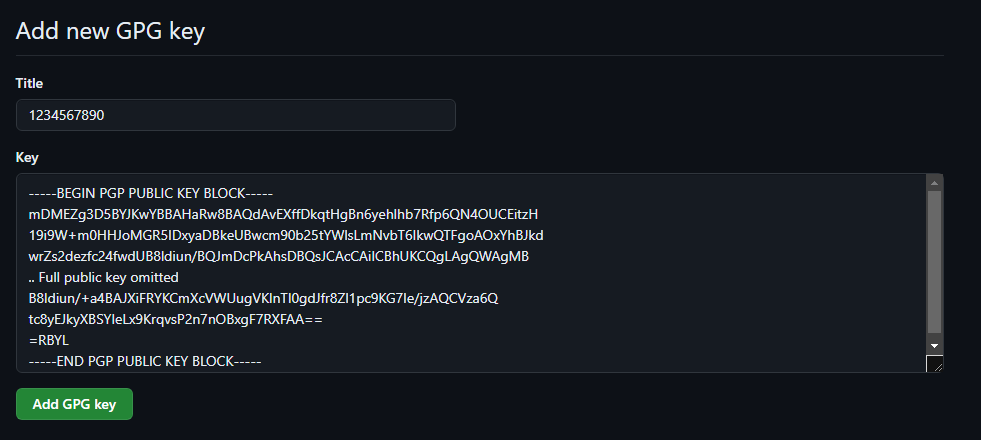
-----END PGP PUBLIC KEY BLOCK-----Next, copy the full output of the public key, beginning with -----BEGIN PGP PUBLIC KEY BLOCK----- and ending with -----END PGP PUBLIC KEY BLOCK----- and go to the keys section in your GitHub account to create a New GPG key:

Next, provide a Title (you could use the Public Key ID) and paste the public key output into the Key section:
Tell Git About Your GPG Key
Now, configure Git to always sign commits with GPG by default using the newly created GPG key (the --global flag indicates that the configuration should be applied globally to all repositories on your system):
$ git config --global commit.gpgsign true
$ git config --global user.signingkey <Private Key ID>
Finally, sign your commit (see How to Sign a Commit as a reminder) and enjoy the Verified label shown in GitHub:
$ git commit -S -m 'My signed commit'